Exploring Spring-Boot and Spring-Security: Custom token based authentication of REST services with Spring-Security and pinch of Spring Java Configuration and Spring Integration Testing.
- Processes, standards and quality
- Technologies
- Others
Full source code of this example on GitHub.
Spring applications are not secured by default. To provide required authentication and authorization facilities you need to either create them from the scratch or use existing security framework. Writing such a framework from the scratch is almost never a good idea. It’s complicated and needs to be thoroughly tested, preferably hardened on the battlefield of production. Better idea is to use some existing, matured and proven frameworks. The natural choice for Springers is to use Spring-Security. Formerly known as Acegi Security, later incorporated under the umbrella of Spring components, Spring-Security is just a jar file that you include in the software development project. It provides you with vast amount of well-designed functionality ready to be applied to your application. It is a framework that gives you a lot but on the other side it is still quite complicated, mainly, due to a lot of working parts and general nature of security related mechanisms. Spring-Security is also extremely extensible and open for customization, extensions and fine-tune configuration. All-in-all, it’s a complicated but powerful beast.
Spring-Boot according to official short description is: “Spring Boot makes it easy to create stand-alone, production-grade Spring based Applications that can you can „just run”. We take an opinionated view of the Spring platform and third-party libraries so you can get started with minimum fuss. Most Spring Boot applications need very little Spring configuration.” And it delivers what it states it should. Creates Spring-Boot project, provides simple config in Maven or Gradle, drops dependencies on required libraries and baam! everything will automagically configure itself. If Spring-Boot with autoconfiguration enabled detects Spring-Security jar on the classpath it will configure and enable security using default options. So don’t be surprised if your Spring MVC services suddenly become inaccessible due to lack of authentication credentials in your calls!
Spring Java Config is just an approach to configure everything by using Java classes. So say no to xml files and move into statically typed, compiler safe, refactorable world of Java classes, methods and annotations. And things are looking good here especially with Servlet 3.0, specification that allows configuring servlet and container using Java as well, which Spring gladly makes use of. Spring-Boot prefers Java config and I will try to use it as much as possible.
Spring Integration Testing is Spring support for writing proper integration tests. Spring-Boot brings its own improvements and as Boot by default is using embedded container like Tomcat or Jetty, writing integration tests is really awesome. We will use such tests to check if our security mechanisms are working as expected.
Spring-Security from 10,000 feet
Security is one of the so called ‘cross cutting concerns’. It means that it cuts or touches across whole core domain/business functionality. Such cross cutting concerns can really obscure the core business code with infrastructure related one, especially if you have more than one such concern. And usually you do have more than one. Spring-Security when developing Spring web applications (for example Spring MVC) adds quite a few http filters that delegate to authentication and authorization components. Moreover,it provides aspects that wrap around selected core business functionality using AOP. This approach keeps business code almost entirely free of any security related, infrastructural stuff. We can think about security as kind of add-on that can be applied or removed to existing code base. This, of course, makes everything nicely decoupled and isolated, which leads to much more clean, readable and maintainable code.
So Spring-Security adds a lot of filters. Filter is a component that gets called when HTTP Request arrives at the application server. Filter can do whatever it wants to the request, it can even totally change request parameters. When filter is done with processing, it can do one of two things. It can pass (probably modified) http request to the next filter or it can stop processing and return HTTP Response. Yes, filters can block or, in other words, disallow any further processing of HTTP Request. Filter that allowed request to be processed will also process HTTP Response that was generated by other components. So it can change response as well. Filters can be chained and assuming that each filter allowed request to be processed by the next filter such a request finally ends up in Spring DispatcherServlet and gets routed to our Java controller methods.
Spring-Security provides a handy couple of filters in its default filter chain. A lot of them provide out-of-the box security functionality for many of security schemes currently used in the world, e.g. Basic HTTP Authentication, HTTP Form Based Authentication, Digest Auth, X.509, OAuth-2 etc. In this blog and code I will provide my own filter and attach it somewhere in the default Spring-Security filter chain. I don’t want to create the whole filter chain and configuration from the scratch, I just want to provide some custom functionality while disabling default filters like Basic or Anonymous.
Let’s describe flow of authentication request for Basic HTTP Authentication used in MVC application. At first, client (a browser for example) sends HTTP request to get some resource located at URL. This request has no authentication credentials of any sort, so it is anonymous, random call. As the request has no credentials, Spring filters will pass it through without any special processing. Such a request will land at AbstractSecurityInterceptor, which in conjunction with AccessDecisionManager will determine target resource and method, and then makes a decision whether or not such unauthenticated request is allowed to access this resource. Security configuration determines if it is allowed or not and what particular roles authenticated user must have to access the resource (authorization). In our case we assume that the resource requires user to be authenticated, so AbstractSecurityInterceptor will throw some subclass of AuthenticationException. This exception will be caught by ExceptionTranslationFilter which is one of many filters in the default security chain. ExceptionTranslationFilter will validate type of the exception and if it indeed is AuthenticationException it will delegate call to AuthenticationEntryPoint component. For Basic Authentication, it will prepare correct HTTP Response with so called ‘Authentication Challenge’, which will be status 401 (Unauthorized) and proper headers for Basic. Client can then respond. Browsers display a dialog for the user to enter username and password, other clients can do different things to obtain such credentials.
The result is the same, another request for the same resource, but with credentials in proper HTTP Headers. This time Spring filters have a lot more to do. First, they extract credentials and use them to build Authentication object that acts as input for further processing. This Authentication is passed to AuthenticationManager that asks its configured and attached AuthenticationProviders, if any of them can process such type of Authentication (UsernamePasswordAuthentication). By default, there is such provider for Basic and it will query UserDetailsService for UserDetails object corresponding for such username. This UserDetails will then be validated against password and if everything is present, matches and is otherwise correct, new output Authentication object will be created. This output object is marked as successfully authenticated and filled with GrantedAuthorities that corresponds to the roles assigned to this particular user.
Where are UserDetails taken from? It depends on configuration. It can be obtained from memory or from database or webservice call – it’s up to your implementation of UserDetailsService.
So we have authenticated Authentication. The filter that initiated this operation will put this Authentication to SecurityContextHolder and pass the request down to the next filters. Any further filters will check if SecurityContextHolder holds valid Authentication and use GrantedAuthorities to do authorization validation. The same goes for AOP extended methods of our controllers (if we decide to use this approach).
Our code does not need to interact with SecurityContextHolder but if it needs to have some authentication information, it must. If we use direct access, it will make our testing life much more complicated so there are ways to minimize this impact that I will show later. Oh, by the way, SecurityContextHolder uses ThreadLocal under the hood and is filled and cleared on per request basis.
Looks complicated? Well that’s just how the things are and believe me this is one of the simplest flows. Unfortunately, there is no good default flow for securing REST calls using token based approach, unless you can use OAuth 2.0. In my case, I have a legacy external service that I need to consume but I would still like to provide token based approach to the clients of my REST API. So let’s dig through the solution and code.
The solution
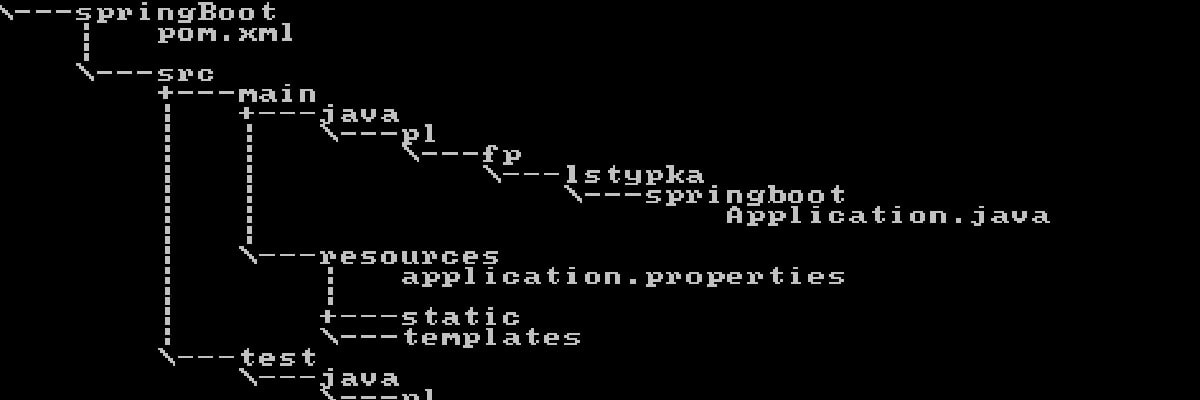
Let’s start with short description of packages. “api” is for REST controllers. “domain” should hold our business and domain code. It should be completely free from any infrastructural or REST/HTTP stuff. “infrastructure” will hold implementations of required interfaces, access to external services and security components. A lot of security code is quite generic and will work with any external service authentication mechanism. I have added some exemplaryexample implementation that does not do any network calls and it is easy to extend it to suit your needs.
The build management tool is Gradle and in a build.gradle file you can see that Spring-Boot is added with additional plugin that allows running app from command line using gradle. The important parts are spring-boot-starter-security and spring-boot-starter-test:
compile 'org.springframework.boot:spring-boot-starter-web'
compile 'org.springframework.boot:spring-boot-starter-tomcat'
compile 'org.springframework.boot:spring-boot-starter-security'
compile 'org.springframework.boot:spring-boot-starter-actuator'
compile 'org.springframework.boot:spring-boot-starter-aop'

testCompile 'org.springframework.boot:spring-boot-starter-test'
ehCache.xml configures EhCache to keep tokens for 4 hours and use memory only storage. So by default, our tokens will be evicted after 4 hours since issue time.
I wanted to use HTTPS so I generated some self-signed certificate (JKS) and class ContainerConfiguration is just a boilerplate code to make Spring-Boot work with HTTPS. Such certificate is good for development and testing or maybe even for intranet services but you should use properly signed one for any other use case. You can override this certificate by properties at deployment time. The properties are in application.properties, for example port of our Tomcat is 8443.
Spring-Boot application ‘instantiates’ itself by default, which leads to running embedded application server like Tomcat or Jetty. We can annotate application class and make it our main configuration source for Spring-Boot:
@Configuration
@EnableWebMvc
@ComponentScan
@EnableAutoConfiguration
@EnableConfigurationProperties
public class Application {

public static void main(String[] args) {
SpringApplication.run(Application.class, args)
}
}
That’s a lot of annotations!
@Configuration – tells Spring that this class will act as a configuration source. There can be many such classes.
@EnableWebMvc – enables DispatcherServlet, mappings, @Controller annotated beans. We definitely need this as we are using MVC to expose REST endpoints.
@ComponentScan – enables autoscanning and processing of all Spring components in current and descendant packages.
@EnableAutoConfiguration – tells Spring-Boot to try to autoconfigure itself by using default values. Any our custom parts replace the defaults.
@EnableConfigurationProperties – it allows having beans annotated with @ConfigurationProperties that is beans that will be filled with properties from various sources.
That’s all that is required to run default Spring MVC container. No xmls, no web.xml, no servlet container configuration.
ApiController is base class for all Controllers. It holds URLs of our REST services. I have added two Controllers. One is AuthenticateController with one method mapped for POST request on /api/v1/authenticate. This method however will never be entered because of our implementation of AuthenticationFilter, which will be described in a moment. The method is yet still present to become part of documentation for both in-code and REST services (for example using Swagger).
SampleController is more interesting:
@RestController
@PreAuthorize("hasAuthority('ROLE_DOMAIN_USER')")
public class SampleController extends ApiController {
    private final ServiceGateway serviceGateway;

    @Autowired
    public SampleController(ServiceGateway serviceGateway) {
        this.serviceGateway = serviceGateway;
    }
[............]
The first @RestController is new to Spring 4. It states that all mapped methods will produce direct response output using @ResponseBody. So you don’t need to put this annotation on every method. The default mapping is JSON so this is exactly what we need.
@PreAuthorize annotation is very important for this example. This controller will be extended by AOP and every of its methods will require for the current request to be authenticated with principal that has GrantedAuthority: ROLE_DOMAIN_USER. SecurityContextHolder will be queried to get this information. For @PreAuthorize annotation to have effect there is a need to have @EnableGlobalMethodSecurity annotation on @Configuration bean somewhere. I will get to this soon.
@PreAuthorize security is one of the simplest ways to protect our resources. For our example use-case you could use URL request protection in configuration, which is even simpler but I have decided to show this method as well. I have used URL protection for Spring-Actuator endpoints. These methods are simple but they are clean, easy to see and maintain and this should be our goal as much as possible.
We are also autowiring implementation of Gateway to some service, so controller code will not be obscured by implementation details. It will allow us to test it later with ease.
There may be a need to have some details regarding currently authenticated principal. If we would directly use SecurityContextHolder (static context with ThreadLocal) to get this information we would make unnecessary coupling to some internal concern and our code would be much harder to test. There is however a neat way to obtain the information we need.
@RequestMapping(value = STUFF_URL, method = RequestMethod.POST)
public void createStuff(@RequestBody Stuff newStuff, @CurrentlyLoggedUser DomainUser domainUser) {
    serviceGateway.createStuff(newStuff, domainUser);
}
Here, we can see that our SampleController has a method of which one parameter is annotated with @CurrentlyLoggedUser. What is that? It’s a custom annotation that wraps Spring’s @AuthenticationPrincpial:
@Target({ElementType.PARAMETER, ElementType.TYPE})
@Retention(RetentionPolicy.RUNTIME)
@AuthenticationPrincipal
public @interface CurrentlyLoggedUser {
}
So basically, our @CurrentlyLoggedUser is @AuthenticationPrincipal. I just like my name better than AuthenticationPrincipal. Any Spring Controller that has a method with parameter annotated with that will get current SecurityContextHolder Authentication.getPrincipal(). This is much more testable and clean.
DomainUser and Stuff are simple Java beans, nothing interesting here.
Let’s dig through more interesting class: SecurityConfig. This is the second @Configuration bean, this time used to configure security:
@Configuration
@EnableWebMvcSecurity
@EnableScheduling
@EnableGlobalMethodSecurity(prePostEnabled = true)
public class SecurityConfig extends WebSecurityConfigurerAdapter {
@EnableWebMvcSecurity – a lot is happening by adding this one. Security filters with filter chain are configured and applied. @AuthenticationPrincipal annotation starts working. ExceptionTranslationFilter catches AuthenticationExceptions and forwards to proper AuthorizationEntryPoints. Basically, after this annotation alone our MVC services are not directly accessible anymore.
@EnableScheduling allows to run Spring schedulers and periodically run some tasks. We use scheduler for evicting EhCache tokens.
@EnableGlobalMethodSecurity allows AOP @PreAuthorize and some other annotations to be applied to methods.
SecurityConfig extends WebSecurityConfigurerAdapter which allows to fine tune some configuration:
@Override
protected void configure(HttpSecurity http) throws Exception {
    http.
            csrf().disable().
            sessionManagement().sessionCreationPolicy(SessionCreationPolicy.STATELESS).
            and().
            authorizeRequests().
            antMatchers(actuatorEndpoints()).hasRole(backendAdminRole).
            anyRequest().authenticated().
            and().
            anonymous().disable().
            exceptionHandling().authenticationEntryPoint(unauthorizedEntryPoint());

    http.addFilterBefore(new AuthenticationFilter(authenticationManager()), BasicAuthenticationFilter.class).
            addFilterBefore(new ManagementEndpointAuthenticationFilter(authenticationManager()), BasicAuthenticationFilter.class);
}
We don’t need CSRF and typical HTTP session. We authorize requests on Spring-Actuator endpoints to any principal that has role of backend administrator and we require all other requests to be authenticated. Just authenticated – this config will pass the request to DispatcherServlet for any valid Authentication in SecurityContext. Remember that we use @PreAuthorize to restrict access further to users with role DOMAIN_USER. Then, two custom filters are added somewhere before Spring’s BasicAuthenticationFilter. These filters are main building blocks of our custom token based authentication. We then register custom AuthenticationEntryPoint:
@Bean
public AuthenticationEntryPoint unauthorizedEntryPoint() {
    return (request, response, authException) -> response.sendError(HttpServletResponse.SC_UNAUTHORIZED);
}
It is extremely simple. For any AuthenticationException we want to return the 401 error. That’s all that we want for our REST clients to know. How they handle it is up them.
There is an override that allows configuring AuthenticationManager:
@Override
protected void configure(AuthenticationManagerBuilder auth) throws Exception {
    auth.authenticationProvider(domainUsernamePasswordAuthenticationProvider()).
            authenticationProvider(backendAdminUsernamePasswordAuthenticationProvider()).
            authenticationProvider(tokenAuthenticationProvider());
}
Three AuthenticationProviders are added, each supporting different class of input Authentication object.
At this moment security config is in place and each request needs to pass through AuthenticationFilter and ManagementEndpointAuthenticationFilter.
So it’s time for AuthenticationFilter:
@Override
public void doFilter(ServletRequest request, ServletResponse response, FilterChain chain) throws IOException, ServletException {
    HttpServletRequest httpRequest = asHttp(request);
    HttpServletResponse httpResponse = asHttp(response);

    Optional username = Optional.fromNullable(httpRequest.getHeader("X-Auth-Username"));
    Optional password = Optional.fromNullable(httpRequest.getHeader("X-Auth-Password"));
    Optional token = Optional.fromNullable(httpRequest.getHeader("X-Auth-Token"));

    String resourcePath = new UrlPathHelper().getPathWithinApplication(httpRequest);

    try {
        if (postToAuthenticate(httpRequest, resourcePath)) {
            logger.debug("Trying to authenticate user {} by X-Auth-Username method", username);
            processUsernamePasswordAuthentication(httpResponse, username, password);
            return;
        }

        if (token.isPresent()) {
            logger.debug("Trying to authenticate user by X-Auth-Token method. Token: {}", token);
            processTokenAuthentication(token);
        }

        logger.debug("AuthenticationFilter is passing request down the filter chain");
        addSessionContextToLogging();
        chain.doFilter(request, response);
    } catch (InternalAuthenticationServiceException internalAuthenticationServiceException) {
        SecurityContextHolder.clearContext();
        logger.error("Internal authentication service exception", internalAuthenticationServiceException);
        httpResponse.sendError(HttpServletResponse.SC_INTERNAL_SERVER_ERROR);
    } catch (AuthenticationException authenticationException) {
        SecurityContextHolder.clearContext();
        httpResponse.sendError(HttpServletResponse.SC_UNAUTHORIZED, authenticationException.getMessage());
    } finally {
        MDC.remove(TOKEN_SESSION_KEY);
        MDC.remove(USER_SESSION_KEY);
    }
}
It extends GenericFilterBean and overrides the only required method doFilter. It tries to be as generic as possible, delegating real work to external implementations. This is our place in filter chain and it seems like excellent place to initiate some authentication facilities and work with SecurityContextHolder. First, we check if we have a POST on /api/v1/authenticate and if yes we are building input Authenticate instance of type UsernamePasswordAuthentication:
private void processUsernamePasswordAuthentication(HttpServletResponse httpResponse, Optional username, Optional password) throws IOException {
    Authentication resultOfAuthentication = tryToAuthenticateWithUsernameAndPassword(username, password);
    SecurityContextHolder.getContext().setAuthentication(resultOfAuthentication);
    httpResponse.setStatus(HttpServletResponse.SC_OK);
    TokenResponse tokenResponse = new TokenResponse(resultOfAuthentication.getDetails().toString());
    String tokenJsonResponse = new ObjectMapper().writeValueAsString(tokenResponse);
    httpResponse.addHeader("Content-Type", "application/json");
    httpResponse.getWriter().print(tokenJsonResponse);
}

private Authentication tryToAuthenticateWithUsernameAndPassword(Optional username, Optional password) {
    UsernamePasswordAuthenticationToken requestAuthentication = new UsernamePasswordAuthenticationToken(username, password);
    return tryToAuthenticate(requestAuthentication);
}
This instance is passed to Spring’s AuthenticationManager, which finds AuthenticationProvider that supports this type of input Authentication. It happens that we have such custom provider. Provider tries to authenticate. We expect returned output Authentication instance (which can be, and usually is, a different class and instance than input Authentication) to not be null and be authenticated. It’s a good practice to keep Authentication implementations immutable, although I’m not completely conforming to this rule (if you never allow authenticated Boolean state to change, you are on the safe side). It, then, immediately returns http response with OK and JSON with generated token. No other filter down the chain is called so no controller method is executed. It would be better to pass the request to AuthenticationController and to allow it to return the token and 200 OK Status, but I just wanted to demonstrate a point.
If call is not for authenticating endpoint, we check whether we have token in header. If there is a token, we move to another processing path. In any other case, (no authenticate post and lack of token) we pass call further to the dispatcher. This may sound strange. Why are we passing our request? But it is actually how spring security is designed. While we could immediately return 401 without chaining we would lose all fine tune security config – we want our call to proceed and be processed by dispatcher rules and/or method rules. There may be some services that do not require authentication or a call may be for some static resource like icon. Nonetheless, any security violation (lack of SecurityContextHolder) will result in spring AuthenticationException to be thrown, caught by ExceptionTranslationFilter and our unathorizedEntryPoint called.
But if token is present, we try to fill SecurityContextHolder with authenticated Authentication. So we prepare proper input Authentication this time of type PreAuthenticatedAuthenticationToken and pass it again to AuthenticationManager that will call proper Provider. This provider will try to validate token and decide if it is OK or not. Again, the result must be properly filled and authenticated output Authentication. If token is OK and AuthenticationFilter gets valid Authentication, it fills SecurityContextHolder and passes request to the next filter.
ManagementEndpointAuthenticationFilter is very similar to AuthenticationFilter but it does not make use of tokens. It has hardcoded backend admin login username with password provided from property at deployment time. It checks if username and password from headers matches these when targeting Spring-Actuator endpoints that require authentication. For example, /health is unprotected while /metrics is.
It’s time to look at the providers. DomainUsernamePasswordAuthenticationProvider:
public class DomainUsernamePasswordAuthenticationProvider implements AuthenticationProvider {

    private TokenService tokenService;
    private ExternalServiceAuthenticator externalServiceAuthenticator;

    public DomainUsernamePasswordAuthenticationProvider(TokenService tokenService, ExternalServiceAuthenticator externalServiceAuthenticator) {
        this.tokenService = tokenService;
        this.externalServiceAuthenticator = externalServiceAuthenticator;
    }

    @Override
    public Authentication authenticate(Authentication authentication) throws AuthenticationException {
        Optional username = (Optional) authentication.getPrincipal();
        Optional password = (Optional) authentication.getCredentials();

        if (!username.isPresent() || !password.isPresent()) {
            throw new BadCredentialsException("Invalid Domain User Credentials");
        }

        AuthenticationWithToken resultOfAuthentication = externalServiceAuthenticator.authenticate(username.get(), password.get());
        String newToken = tokenService.generateNewToken();
        resultOfAuthentication.setToken(newToken);
        tokenService.store(newToken, resultOfAuthentication);

        return resultOfAuthentication;
    }

    @Override
    public boolean supports(Class<> authentication) {
        return authentication.equals(UsernamePasswordAuthenticationToken.class);
    }
}
The “supports” method tells Spring’s AuthenticationManager what class of input Authentication this provider is capable of processing. Authenticate method tries to authenticate user by username and password. It validates parameters presence and delegates to implementation of a real provider coming from external service. It is a place in which you could ask database, service, memory or any other facility.
If authentication is correct, token service is asked for new fresh token and then output, authenticated Authentication is stored somewhere at token service. Output Authentication is returned to AuthenticationFilter. This method must conform to some strict rules. Proper exceptions must be thrown in case of particular events: DisabledException, LockedException, BadCredentialsException. Null should be returned if Provider is unable to process input Authentication. Credentials should always be validated and if valid properly, authenticated Authentication must be returned.
So what happens next? When client obtained valid token and wants to call some REST endpoint other than /authenticate? It needs to provide X-Auth-Token header. If this token is present, AuthenticationFilter creates proper input Authentication object and AuthenticationManager calls TokenAuthenticationProvider to authenticate. Implementation of this provider is very simple. What we actually want is to validate if token is present and not empty and then ask our TokenService if it contains such token. The presence of this token just means that we have a request from someone who has already authenticated, so we can return the authenticated Authentication. So happens that we stored such object from /authenticate in TokenService (EhCache) as key-value with token as a key:
public class TokenAuthenticationProvider implements AuthenticationProvider {

    private TokenService tokenService;

    public TokenAuthenticationProvider(TokenService tokenService) {
        this.tokenService = tokenService;
    }

    @Override
    public Authentication authenticate(Authentication authentication) throws AuthenticationException {
        Optional token = (Optional) authentication.getPrincipal();
        if (!token.isPresent() || token.get().isEmpty()) {
            throw new BadCredentialsException("Invalid token");
        }
        if (!tokenService.contains(token.get())) {
            throw new BadCredentialsException("Invalid token or token expired");
        }
        return tokenService.retrieve(token.get());
    }

    @Override
    public boolean supports(Class<> authentication) {
        return authentication.equals(PreAuthenticatedAuthenticationToken.class);
    }
}
TokenService wraps EhCache and provides Spring scheduler that periodically (every 30 minutes) evicts tokens that are living for more than 4 hours (see our config for ehCache):
public class TokenService {

    private static final Logger logger = LoggerFactory.getLogger(TokenService.class);
    private static final Cache restApiAuthTokenCache = CacheManager.getInstance().getCache("restApiAuthTokenCache");
    public static final int HALF_AN_HOUR_IN_MILLISECONDS = 30 * 60 * 1000;

    @Scheduled(fixedRate = HALF_AN_HOUR_IN_MILLISECONDS)
    public void evictExpiredTokens() {
        logger.info("Evicting expired tokens");
        restApiAuthTokenCache.evictExpiredElements();
    }

    public String generateNewToken() {
        return UUID.randomUUID().toString();
    }

    public void store(String token, Authentication authentication) {
        restApiAuthTokenCache.put(new Element(token, authentication));
    }

    public boolean contains(String token) {
        return restApiAuthTokenCache.get(token) != null;
    }

    public Authentication retrieve(String token) {
        return (Authentication) restApiAuthTokenCache.get(token).getObjectValue();
    }
}
So if client makes a call with token, which has been evicted, TokenAuthenticationProvider will throw proper AuthenticationException, which will be translated to 401 response. It means that client needs to obtain new token by calling authenticate. This can be easily extended with refreshToken mechanism if desired. Also EhCache config allows to easily set different policy of evicting tokens. Now, they are evicted after 4 hours, no matter if the holder is active or not.
So now we can see how our authentication mechanism validates credentials and fills SecurityContextHolder. Such SecurityContextHolder allows other security mechanisms from Spring to kick in and work properly. However, we somehow need our authenticated external service handler in our gateway implementations. I have decided to use a simple mechanism that allows us to keep the code fully testable and not bloated with SecurityContextHolder calls. There is probably a better way with custom request-like scope for Spring bean but I have not used it.
Let’s get back to DomainUsernamePasswordAuthenticationProvider for a moment. It gets username and password as credentials and delegates authentication to our external authenticator. I have provided the simplest possible implementation that does not use any network calls etc:
public class SomeExternalServiceAuthenticator implements ExternalServiceAuthenticator {

    @Override
    public AuthenticatedExternalWebService authenticate(String username, String password) {
        ExternalWebServiceStub externalWebService = new ExternalWebServiceStub();

        // Do all authentication mechanisms required by external web service protocol and validated response.
        // Throw descendant of Spring AuthenticationException in case of unsucessful authentication. For example BadCredentialsException

        // ...
        // ...

        // If authentication to external service succeeded then create authenticated wrapper with proper Principal and GrantedAuthorities.
        // GrantedAuthorities may come from external service authentication or be hardcoded at our layer as they are here with ROLE_DOMAIN_USER
        AuthenticatedExternalWebService authenticatedExternalWebService = new AuthenticatedExternalWebService(new DomainUser(username), null,
                AuthorityUtils.commaSeparatedStringToAuthorityList("ROLE_DOMAIN_USER"));
        authenticatedExternalWebService.setExternalWebService(externalWebService);

        return authenticatedExternalWebService;
    }
}
It somehow tries to authenticate by some provider specific mechanism and then create Authentication implementation called AuthenticatedExternalWebService. This implementation also holds a Stub or Proxy to real external web service. This Stub/Proxy will use authenticated calls, probably over the network. This authenticated service can hold any security context like WS-Security, Basic credentials, OAuth2 Bearer Token etc. AuthenticationFilter will then set this AuthenticatedExternalWebService (implementation of Authentication) in TokenService (EhCache) and later retrieve it when validating token and put into SecurityContextHolder.
Now we need to get to this Stub/Proxy from our Gateway implementation. I have added a provider for this AuthenticatedExternalWebService:
@Component
public class AuthenticatedExternalServiceProvider {

    public AuthenticatedExternalWebService provide() {
        return (AuthenticatedExternalWebService) SecurityContextHolder.getContext().getAuthentication();
    }
}
And this provider is injected to Gateway:
public abstract class ServiceGatewayBase {
    private AuthenticatedExternalServiceProvider authenticatedExternalServiceProvider;

    public ServiceGatewayBase(AuthenticatedExternalServiceProvider authenticatedExternalServiceProvider) {
        this.authenticatedExternalServiceProvider = authenticatedExternalServiceProvider;
    }

    protected ExternalWebServiceStub externalService() {
        return authenticatedExternalServiceProvider.provide().getExternalWebService();
    }
}
which allows to get the external service proxy. For testing purposes we can easily inject our own mock implementation of provider.
Ok, that’s about it for example implementation. It’s time to move to testing.
Testing
It would be good to test if our implementation works and have an automated regression tests that would validate it in the future, wouldn’t it? Spring-Boot has excellent support for various types of tests. In my example I want to create integration tests that would deploy app on embedded container and run full stack Spring context with minimal mocking. This way the tests would run against all AOP, filters and configuration. Such tests are much slower than unit ones but as you will see they can be invaluable tool for getting high quality and confidence.
Let’s look at SecurityTest class:
@RunWith(SpringJUnit4ClassRunner.class)
@SpringApplicationConfiguration(classes = {Application.class, SecurityTest.SecurityTestConfig.class})
@WebAppConfiguration
@IntegrationTest("server.port:0")
public class SecurityTest {
First, we must make sure that our jUnit tests are running with Spring Runner.
@WebAppConfiguration tells Spring that it should use WebApplicationContext, which is important because that’s exactly what we want to test – a web application. We can provide custom configuration for test context by @SpringApplicationConfiguration. Here, I want to provide test with configuration from our main Application class and additionally, I want to override some beans by providing SecurityTestConfig.
@IntegrationTest sets Spring for integration test and configures it to run embedded container. Port 0 in this case means to use random free port. This is important because it allows us to run tests independently from any currently run container or even run tests in parallel. We can get this random port by property injection:
@Value("${local.server.port}")
int port;
SecurityTestConfig is overriding some beans with Mockito mocks:
@Configuration
public static class SecurityTestConfig {
    @Bean
    public ExternalServiceAuthenticator someExternalServiceAuthenticator() {
        return mock(ExternalServiceAuthenticator.class);
    }

    @Bean
    @Primary
    public ServiceGateway serviceGateway() {
        return mock(ServiceGateway.class);
    }
}
and we can easily inject such mocks into our test, so we can interact with them:
@Autowired
ExternalServiceAuthenticator mockedExternalServiceAuthenticator;
One final thing – our tests require some setup. We will be using RestAssured to call our REST services and validate responses and RestAssured must be configured to point to our services and use HTTPS. We must also reset mocks because Spring context is shared between test method runs, by default. This is a good default because spinning up Spring context takes a lot of time and we usually do not need to shut it down between calls.
@Before
public void setup() {
    RestAssured.baseURI = "https://localhost";
    RestAssured.keystore(keystoreFile, keystorePass);
    RestAssured.port = port;
    Mockito.reset(mockedExternalServiceAuthenticator, mockedServiceGateway);
}
Ok, time to test something. First, simplest test. Our Spring-Actuator /health endpdoint should not be secured:
@Test
public void healthEndpoint_isAvailableToEveryone() {
    when().get("/health").
            then().statusCode(HttpStatus.OK.value()).body("status", equalTo("UP"));
But /metrics should:
 @Test
public void metricsEndpoint_withoutBackendAdminCredentials_returnsUnauthorized() {
    when().get("/metrics").
            then().statusCode(HttpStatus.UNAUTHORIZED.value());
}

@Test
public void metricsEndpoint_withInvalidBackendAdminCredentials_returnsUnauthorized() {
    String username = "test_user_2";
    String password = "InvalidPassword";
    given().header(X_AUTH_USERNAME, username).header(X_AUTH_PASSWORD, password).
            when().get("/metrics").
            then().statusCode(HttpStatus.UNAUTHORIZED.value());
}

@Test
public void metricsEndpoint_withCorrectBackendAdminCredentials_returnsOk() {
    String username = "backend_admin";
    String password = "remember_to_change_me_by_external_property_on_deploy";
    given().header(X_AUTH_USERNAME, username).header(X_AUTH_PASSWORD, password).
            when().get("/metrics").
            then().statusCode(HttpStatus.OK.value());
}
We can add similar tests for our own endpoints:
@Test
public void gettingStuff_withoutToken_returnsUnauthorized() {
    when().get(ApiController.STUFF_URL).
            then().statusCode(HttpStatus.UNAUTHORIZED.value());
}

@Test
public void gettingStuff_withInvalidToken_returnsUnathorized() {
    given().header(X_AUTH_TOKEN, "InvalidToken").
            when().get(ApiController.STUFF_URL).
            then().statusCode(HttpStatus.UNAUTHORIZED.value());
}

@Test
public void gettingStuff_withValidToken_returnsData() {
    String generatedToken = authenticateByUsernameAndPasswordAndGetToken();

    given().header(X_AUTH_TOKEN, generatedToken).
            when().get(ApiController.STUFF_URL).
            then().statusCode(HttpStatus.OK.value());
}
RestAssured with its fluent interface is helping us to keep our tests very compact and readable.
We are ready to build, test, run and deploy our application.
Running, testing, deploying
Application is maintained by Gradle with Spring-Boot Gradle plugin. It eases development because:
gradlew clean -> cleans our output directories and files
gradlew build -> builds and runs tests
gradlew bootRun -> starts our embedded Tomcat and listens on https://localhost:8443
After successful build you will find springsecuritytest.jar file in the build/libs directory. To deploy and run on production server you just copy this jar file to the server and, assuming you have Java 8 runtime, you run:
java -Dkeystore.file=/path_to/keystorejks -Dkeystore.pass=password_to_keystore -Dbackend.admin.password=my_random_password -jar /path_to/springsecuritytest.jar
And that’s all that is required to run Spring-Boot application. Awesome!
Wrap up
Spring-Boot brings a lot in regard to fast development, testing and deployment. It’s powerful but never gets in your way. You want to customize something? Not a problem. Want different JSON processing library? Here you go. The same goes to security. By choosing Spring-Security, you get instant security integration with mature framework. If you can use some existing schemes like Forms or Basic or OAuth-2 you don’t have to do much work. A little configuration, a couple of implementations for getting UserDetails and that’s it. If, however, you want to do some custom processing you need to dig deeper into the inner workings of the framework. It can be quite complicated but I hope that this article helped to shed some light on this subject. And I strongly advise you to read official Spring-Security documentation. It is long but invaluable source of information. And check full source code of this example on GitHub.
Maybe you’ve noticed, or not, we’ve introduced a new option on the blog – „suggest a topic”. Let us know about your problem / suggestion to broaden a topic, and we will try to respond to your request with an article on the blog.