Microsoft Azure Web Jobs – introduction
- Processes, standards and quality
- Technologies
- Others
From time to time there is a need for hard(time or resource consuming) tasks that should be done in a web site background (like creating thumbnails, generating reports etc.). It is often important that this data processing doesn’t have impact on the web site performance. There is some truth in opinion that running background threads and asynchronous operations on Microsoft IIS is possible, but how it works underneath and how to do it right, is not always that obvious. The above might be a strong reason why Web Jobs mechanism, introduced lately to Azure platform, will find recognition among web developers
Before Web Jobs
The convenient way of hosting websites on Azure is to host them as a PaaS (Platform as a Service) way. Then, there is no need to worry about details of virtual machines or application managements and OS updates as ‘someone’ is taking care of that for us. Current Azure compute instances can be divided into three main categories:
- Web Role – front-end/web server instances
- Worker Role – back-end/.Net application instances
- VW Role – virtual machine instances
The first two are supplied with VHD (Virtual Hard Drives) and host VM that is invisible for programmer (well, there is a way to access them via RDP, but the idea is that you should not need to do that). Interaction with those roles is mainly programmatically (deployment from Visual Studio, PowerShell scripts etc.). So basically, they can be labelled as IaaS (Infrastructure as a Service). It is not a very easy task to configure them to run some scheduled or triggered jobs. This gap is now filled with Web Jobs idea.
Web Jobs
Basically, Web Job is a background process that runs on the same virtual machine instance as the web site, for which the Web Job is ‘working’ . It is kind of a lightweight Worker Role associated with web site. Process life cycle is strictly connected with web sites, so restarting a web site will cause a Web Job restart. They will also scale together with the owner web site. That clearly implicates that not every kind of job is a good candidate to become a Web Job. Exemplary tasks that seem to be a perfect match for this new idea are as follows:
- Image processing ( CPU-intensive work)
- Queue/blobs/notification processing – this seems to be especially useful when we want some lightweight processing of Azure blob storage (simple implementation later in this post)
- Retention mechanisms – for example for old log files
- Long running processes
As Web Job we can run applications or script written in many popular languages/technologies:
- .cmd, .bat, .exe
- .ps1
- .sh
- .php
- .py
- .js (using Node.js)
- .jar (not directly – example can be found later in this post)
Execution environments versions can be configured on website details page, using Configure tab:
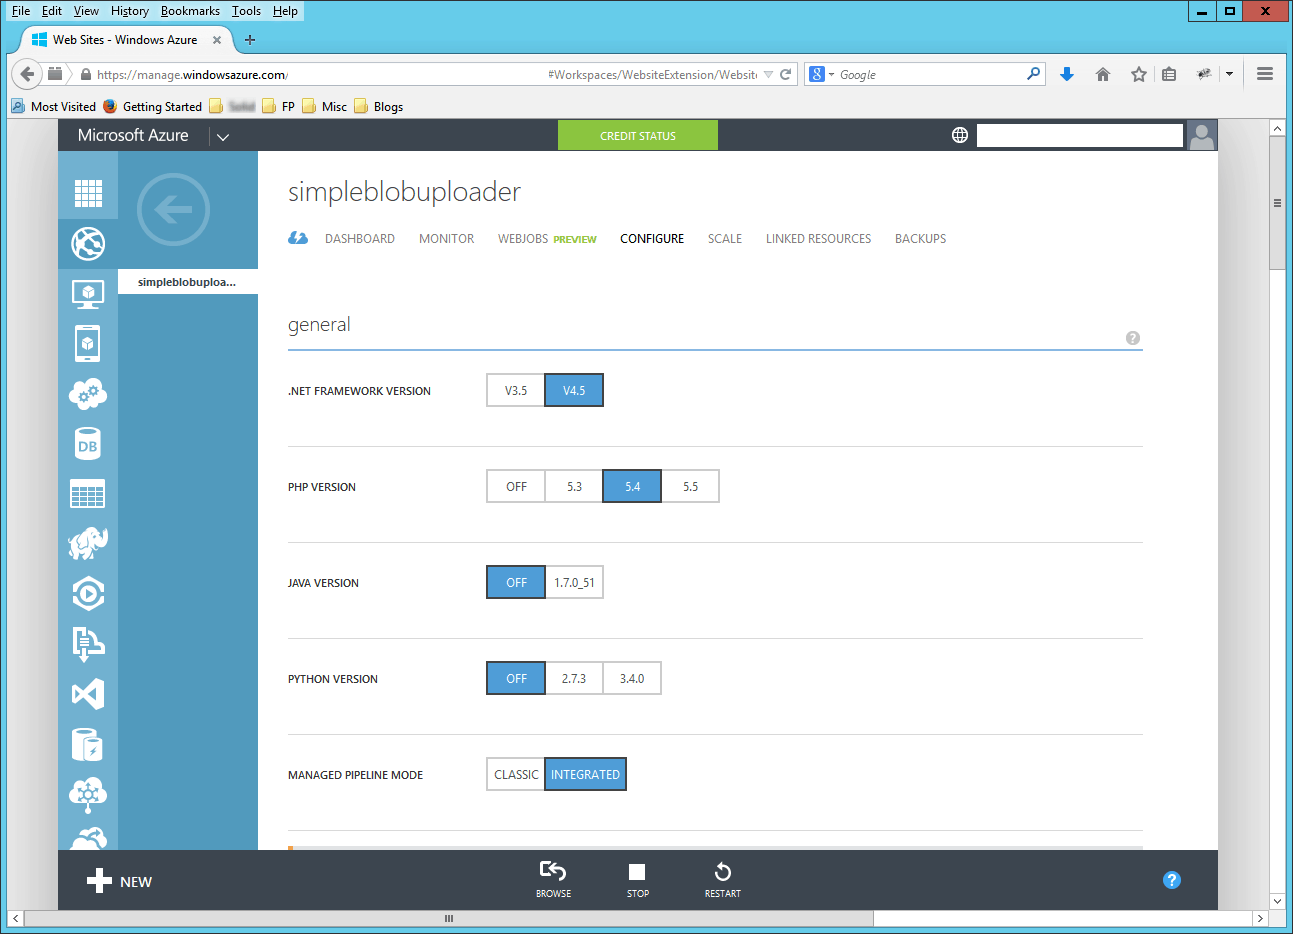
Pic. 1 Web site details page
Azure stores each Web Job in separate folder under path matching a pattern: \wwwroot\App_Data\\. When Azure is asked to run a Web Job it first looks for a file with name matching ‘run.’, if file is not found it looks for the first file with one of the supported extensions. If the second lookup fails, Azure reports error that it was not a valid Web Job.
Job modes
Each Web job can be configured to run in one of the following modes:
1. Continuous – runs all the time, analogy to Windows Service configured with auto start option is in place. Hosting environment monitors the job status and brings it up when process is down. (NOTE: With the current preview, this works properly on standard web sites with ‘always on’ setting. Caution is required when we scale the site up from Standard mode – Web Jobs will be terminated when there is no request for 20 minutes)
2. Scheduled – runs at particular times.
3. On Demand – runs when started manually.
Examples
Examples are really simple. Just to demonstrate the idea behind Web Jobs I’ll show tree cases. The first two of them demonstrate how to use normal console application written in .Net or Java to run them as a Web Job. The last example shows how to create solution to a more specific task.
Plain .Net job
Creating our first Web Job:
1. In Visual Studio create a new Console Application project
2. Write implementation – normal ‘desktop application’ code, no additional references etc.
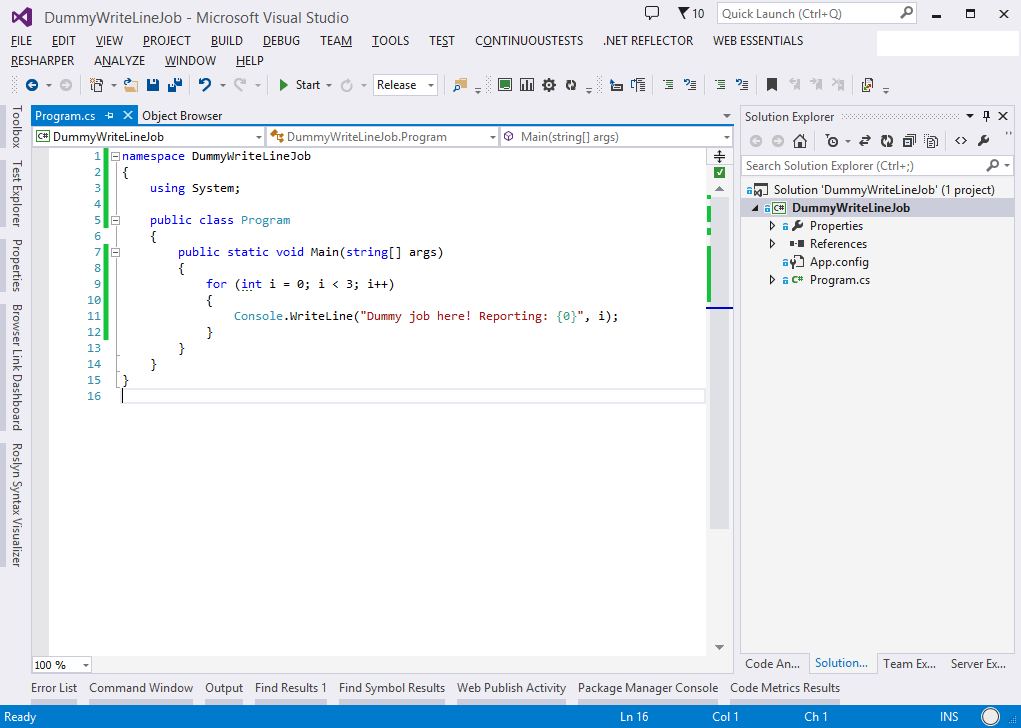
Pic. 2 Implementation of a first .Net example
3. To manually deploy our application as new Web Job – we need to create a zip file that contains our project output (in our case standalone exe file is enough). It is important to remember that the main executable file needs to be on the root level of that zip file. Name of the file is irrelevant. The current limit size for one zip file is 100 MB.

Pic. 3 Output files
4. Open Azure Management Portal and select destination web site.
5. On the web site details page go to Web Jobs tab and click New
6. Now we can configure our new Web Job.
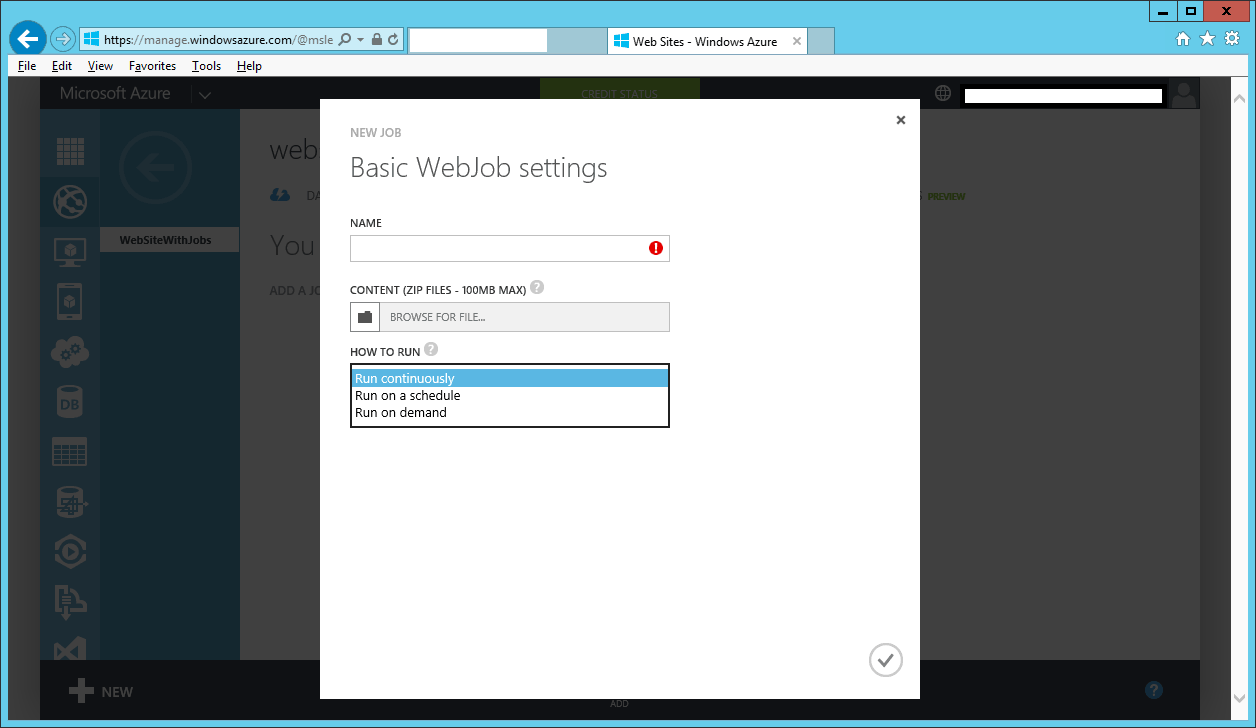
Pic. 4 Web Job creation pane
I want to run this one every 5 minutes:
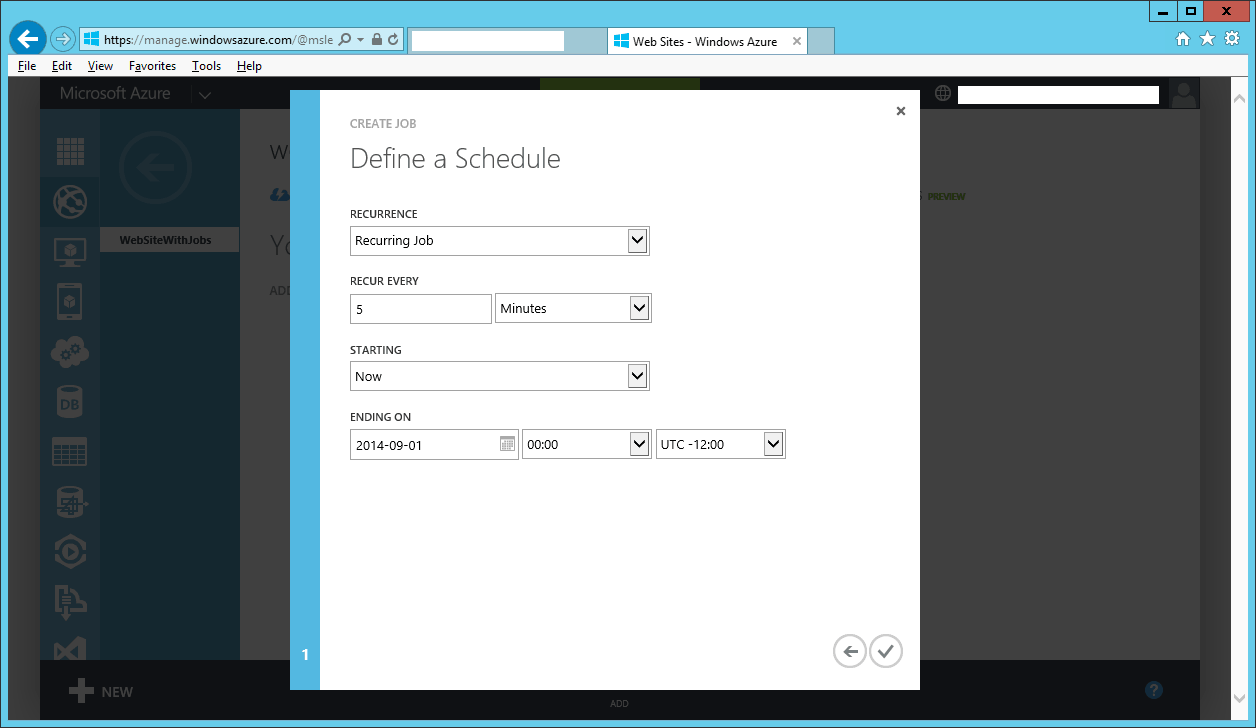
Pic. 5 Web Job scheduler pane
7. Now, our job is up and running. To verify it, we can check log file produced by Web Job (link in Logs columns) – this file contains diagnostic information about run and application output that was redirected automatically to that file (the same goes for error stream, so if, by any chance, program throws exception that is unhandled it will also be logged in that file and job run status will be set as Failed)
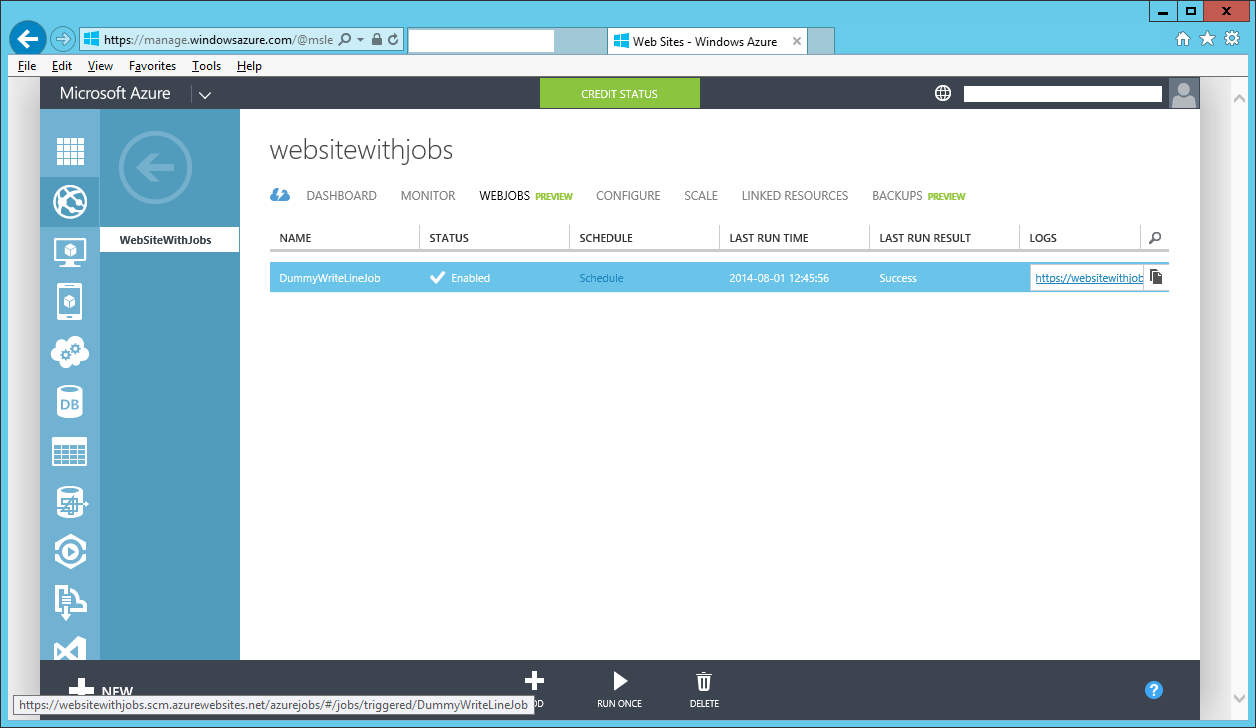
Pic. 6 Web Jobs dashboard
And the output:
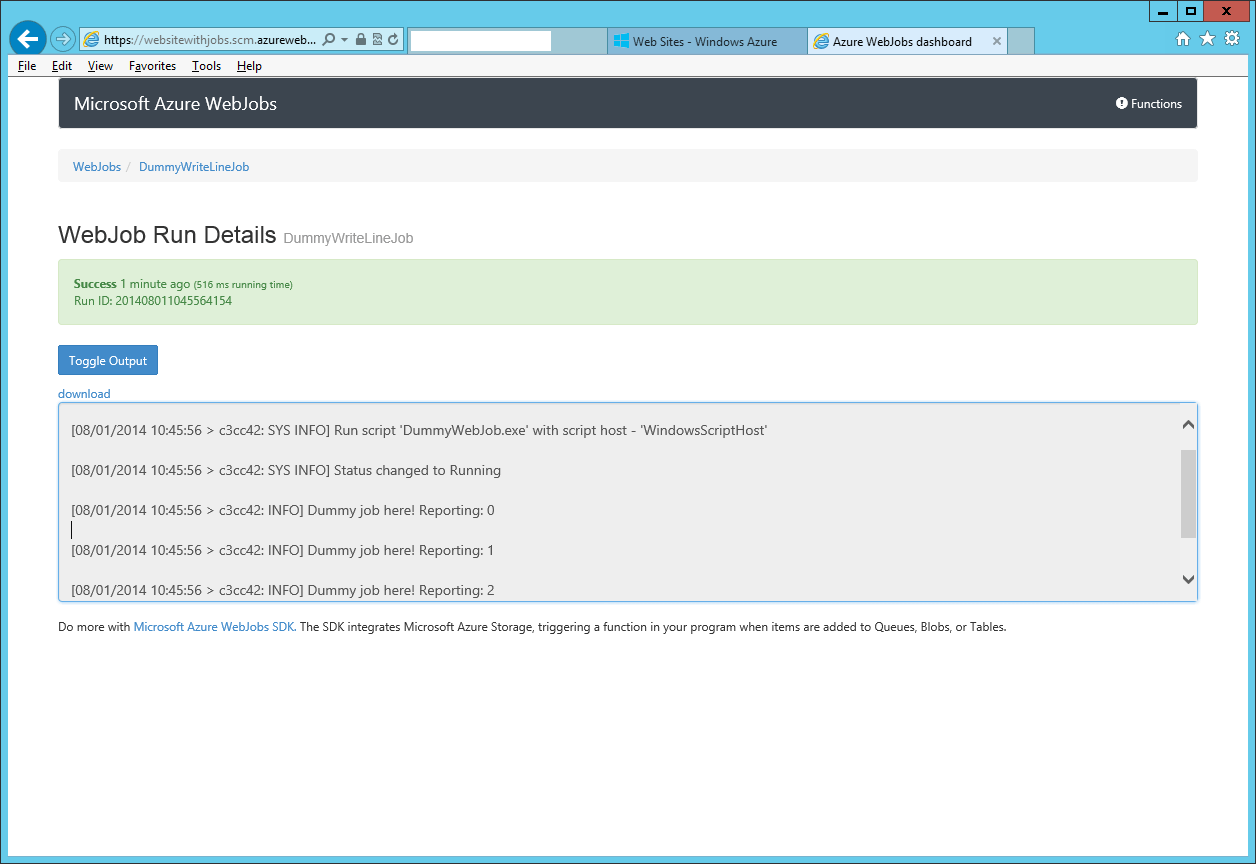
Pic. 7 Output generated by the Web Job
Plain Java example
To prove that not only .Net application will run here – the next example presents Java code (first, we need to ensure that Java is enabled for our web site – as shown in the Pic. 1). In order to do this, we need to: 1. Create a simple Java application, for example:
public class DummyJavaTest {
public static void main(String[] args){
    System.out.println("Hello from Java!");
  }
}
2. Compile it to *.jar 3. Create run.bat file (or another script file that is able to invoke commands), with a single command: %JAVA_HOME%\bin\java DummyJavaTest 4. Create a zip file with those two files and upload it (as in the previous example)
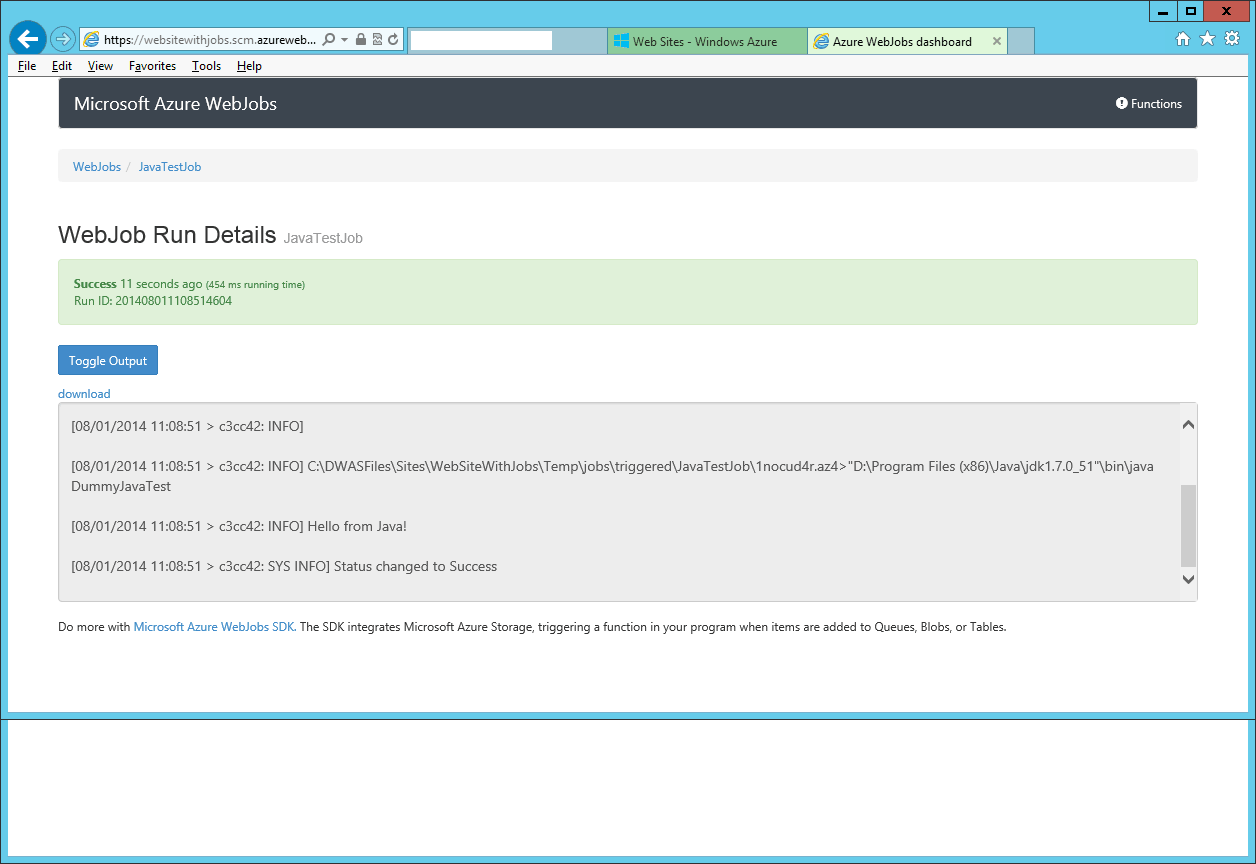
Pic. 8 Java Web Job output
More advanced example
Now, more real-life example of how we can use Web Jobs to be triggered when new content is uploaded to website. Let’s say we are developing new web site, hosted on Azure. On that web site users can file issues and attach pictures. Then, we are asked to create a PDF report for every issue, and it is a critical functionality that has to be delivered ASAP☺. We know that there is an old library for that, but it might be risky to use it inside web application, as it wasn’t tested in that scenario at all. Workflow might be as follows: when uploaded picture is stored in Azure Blob Storage – notification is sent using Azure Queue mechanism. Our Web Job listens to those notifications and when receives one, loads related picture and creates a new PDF report with the mentioned library. Blob and Containers look as follows:

Pic. 9 Containers list for the Blob storage
Containers that have name starting with ‘azure-‘are created by Azure, for storing logs and diagnostic data about Web Jobs executions. Issues container is used for storing pictures related to issues whereas ‘reports’ container is used for storing generated reports. I’ll skip web site code here – it is a simple ASP .NET MVC5 application, which main purpose is to handle pictures upload and cooperate with Blobs and Queues.(NOTE: Azure Blob Storage is not in scope of this post, but if you are interested have a look at introduction on http://azure.microsoft.com/en-us/documentation/articles/storage-dotnet-how-to-use-blobs/ ) When web site’s backend stores picture in Issues blob it sends notification to Issues queue. Message is a valid .Net class that can serialize / de-serialize to / from JSON (using Newtonsoft.Json library). Web Job will be created as a simple console application that is using the PDF library. Firstly, we need to add NuGet package called Microsoft.WindowsAzure.Jobs. Secondly, to create a Web Job that is able to get the notification messages, we have to configure connection string to Azure Blob storages. So in app.config file we need to add connectionStrings section:  The Dashboard connection string tells the Web Job where to send logging data. The Storage connection string indicates where the containers and queues are. Then our Web Job implementation may look like:
   public static void ProcessIncomingIssue(
            [QueueTrigger("issuesqueue")] Contracts.IssueReportedMessage message,
            [Blob("issues/{IssuePictureName}")] Stream input,
            [Blob("reports/{IssuedOn}_report.pdf")] CloudBlockBlob outputBlob)
        {
            Console.WriteLine("Issue request received - start.");
            using (Stream output = outputBlob.OpenWrite())
            {
                var content =
                    PdfLibrary.PdfContent.UseTemplate("report")
                        .WithHeader("Issue reported by " + message.UserName)
                        .WithText(message.Description)
                        .InsertPiture(message.IssuePictureUri)
                        .WithText("Status: registered");

                var resultPdf = PdfLibrary.PdfCreator.ProducePdf(content);

                output.Write(resultPdf, 0, resultPdf.Length);
                outputBlob.Properties.ContentType = "application/pdf";
            }

            Console.WriteLine("Issue request received - stop.");
        }
Interesting points: JobHost is a class that actually do the ‘infrastructure’ related tasks. It reads the bindings used in method signatures, listens for triggers and then invokes proper methods. ProcessIncomingIssue – this method is a handler for received notification from queue associated with Issues Blob Storage. Interesting part here are the parameter attributes. BlobAttribute ask Blob Storage for a Blob item. Item is picked by argument’s constructor parameter based on simple pattern matching. The first part matches container name, and tokens in {} matches property of de-serialized message object. We can also bind input and/or output streams to Cloud Table using TableAttribute or to Queue using QueueAttribute. QueryTriggerAttribute binds parameter to a queue with name given as constructor parameter and waits for notifications sent to that queue. Alternatively, we can use BlobTriggerAttribute, which waits for Blob updates, but in that case we would have to store Issue metadata together with the Blob. So the flow of the method is very simple: read picture from Issues container, create a PDF report, write it to the output stream.
Deployment options
Most programmers are not very happy when they have to do manual deployments. So to make it easier and in more automatic way we have quite a few options: 1. In Visual Studio, we can take advantage of the folder structure of a web site, and place our Web Jobs under /App_Data/jobs///. Then it will be deployed to Azure together with our web site. 2. The second option is to use tools that are delivered together with Azure SDK (http://www.microsoft.com/en-us/download/details.aspx?id=40893). They integrate with Visual Studio nicely. Then, we have an option called ‘Deploy as Web Job’ available in projects context menu (It has some problems with projects that are inside solution folders). 3. If we are creating a new Web Site on Azure, we can select ‘Publish from Source Control’ option. In that case we can select source control system we want to use for that purpose. Git, GitHub, BitBucket, CodePlex, DropBox, Visual Studio Online are currently available systems. From now on there is a new tab called Deployment on Web Site page, on which we see URL of related repository, deployments history etc. For example, we can select local Git repository as our source – we are provided with Git repository URL, to which we can do a git push command. (Local Git repository should be created in applications root folder. Azure will take care of .Net code compilation.)

Pic. 10 Deployments summary dashboard